
Welcome to edmodo summer series #2! This post is looooonggg so I apologize in advance! lol

Edmodo summer series #1 focused on the basics of edmodo and signing up, pretty simple but if you haven't signed up, stop by post #1 to get the step by step guide on becoming a part of the edmodo community.
for summer series #2 we are going to focus on setting up groups and how to post, use the folders, and control member settings.
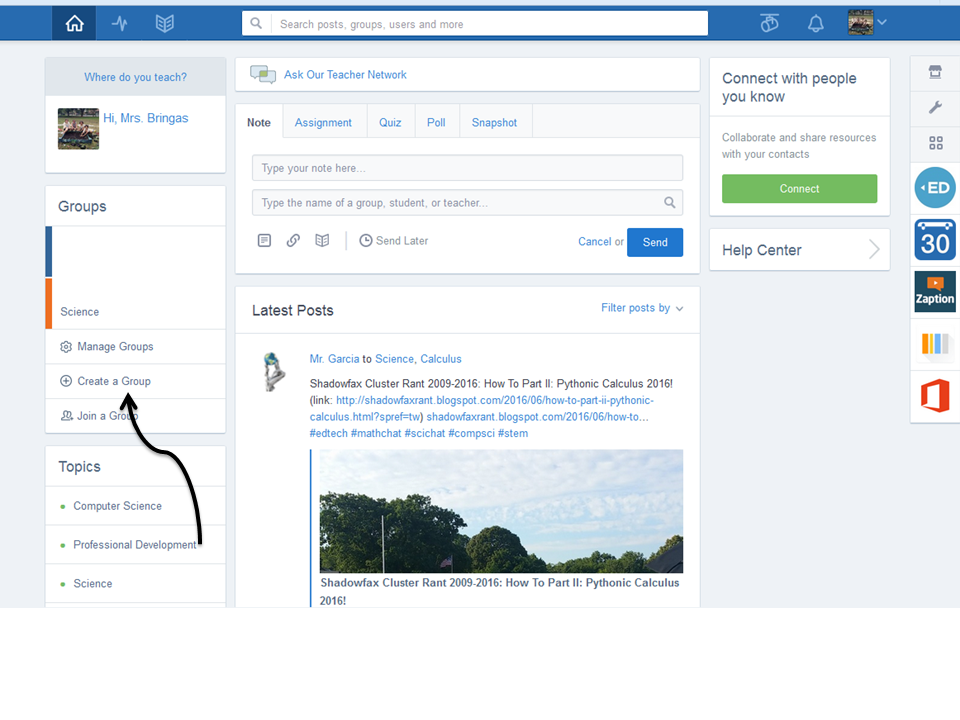
When you first log in, your homepage looks something like this:

1. List of groups - this is where you see all the groups you created or have joined. Managing your groups allows you to favorite which ones you want on the menu bar by pressing the star next to the group name. Creating a group is what we will be doing below, and joining a group is when you want to be part of a group created for a professional development, workshop, department, etc.
2. Quick posting region - post goodies quickly here
3. Apps bar - apps for you and your students
4. News feed - group post appear here
To create a group, click on the create a group option on the left hand side where your groups are listed. (between manage groups and join a group).
A pop up screen appears where you are prompted to type the name of the group, select the grade level or range of grade levels, the subject area, and what color you want the class to appear as (for color coding nerds like me). Click create!

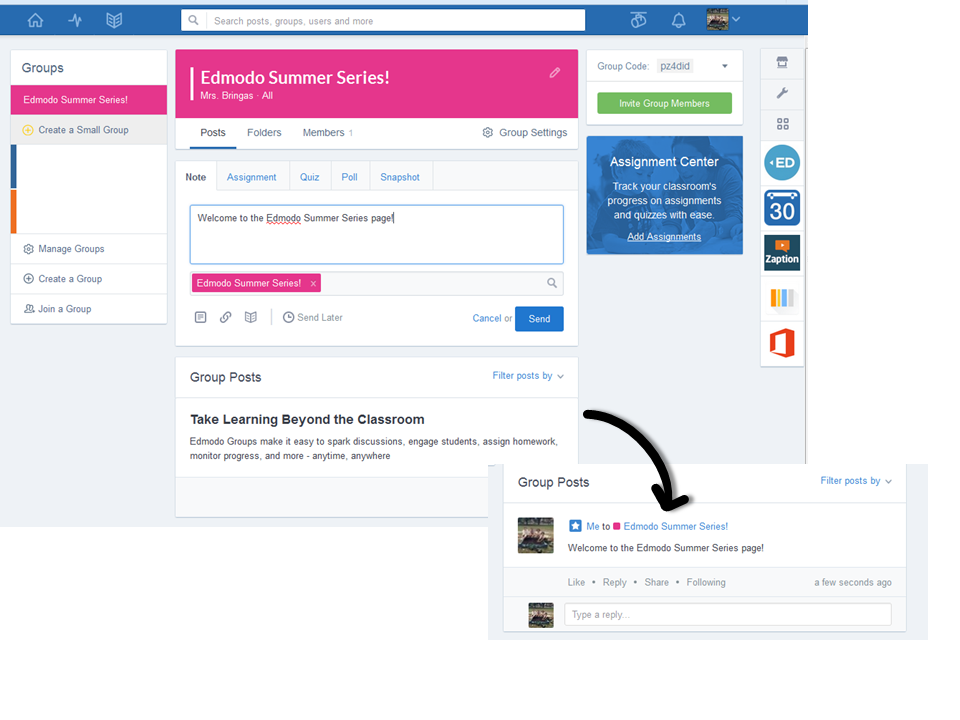
Now your new group looks similar to your homepage and has some cool features too. 

1. Group Code/Invite Group Members - this is how you get your students to join the group. I usually give them the group code and give them about a week to sign up. The sign up process for students is simple and they need a group code in order to complete the process. The code also automatically locks after 14 days for safety reasons. This prevents any random strangers from joining the group some how. You can also have the kids sign up in class or a few days and lock the group yourself. If you have a student who needs to join after its locked, they can still use the same group code but you have to approve them individually (or you can reset the code all together).
2. News feed for the group only! - whatever is posted in the group is seen here
3. Posting region - this is where you can post various options onto the group page (more on that later).
We are going to focus on the few options that are within the black brackets of the photo. (all the other goodies will be explained in the next summer series post!).
One of the easiest things to do and what most teachers focus on when they are edmodo newbies is just posting notes on the group page. Just type what you want the note to say in the large text box, what group you want to send it to in the small text box, and hit send! (you can also add links and attach files, or send the post at a later date with the buttons below the small text box).
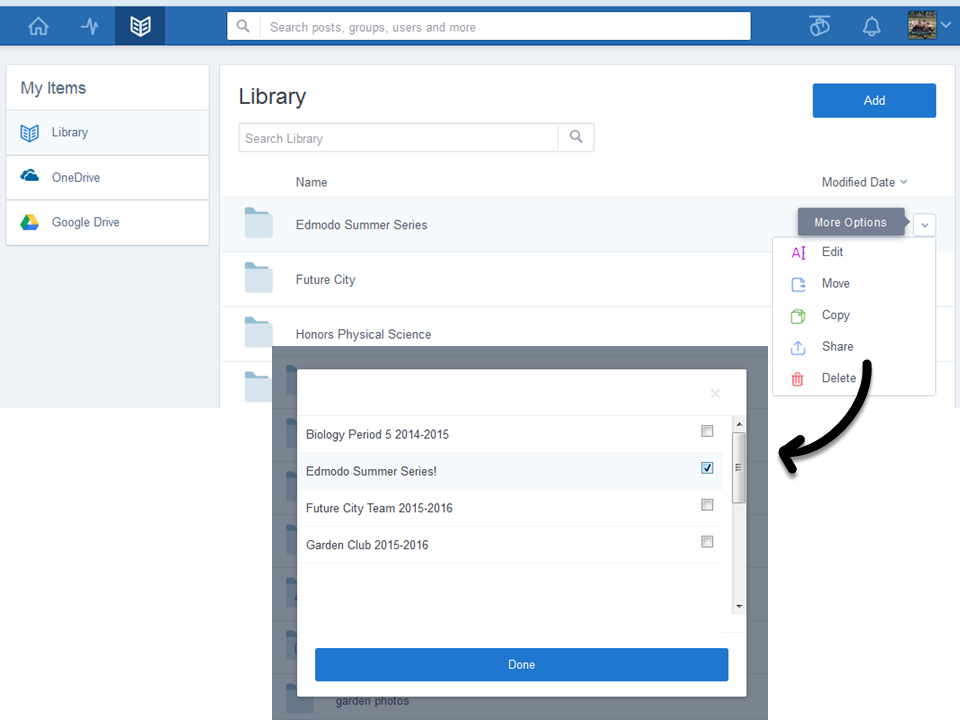
The next button in the black bracket is the folder option. Now this is where you share folders that you have created in your own edmodo library to share with specific classes. Here are some folders from my Biology class this past school year. I shared textbook pdf files, notes, reviews for exams, etc. You can share pretty much anything in these folders.

To create a folder to share with a group:
1. head to your edmodo library
2. click add
3. a pop up window appears where you can add a file, a folder, a link, or a quiz.
4. add a folder and include all the information requested.
5. once it is created, click the drop down menu on the right hand side of the folder and click share.
5. Find the group you want to share it with and it will appear in that groups folder area!


Whew! that was intense!
OK last option is the Members section. Here, anyone who joins your group will be listed in this part of the group. The list shows each members name, what role they play (students, teacher, etc.), their user name, and their profile picture. Under Member Options at the top you can set everyone to read-only which means they are not allowed to post on the group page. I only do this if the students abuse the edmodo digital citizenship rules that we review at the beginning of the year. Contributors allows them to add to folders and post more content. I usually just keep them as students and not anything else.

If you want to make changes to a specific student, there is a manage link next to each user that opens a list of options.
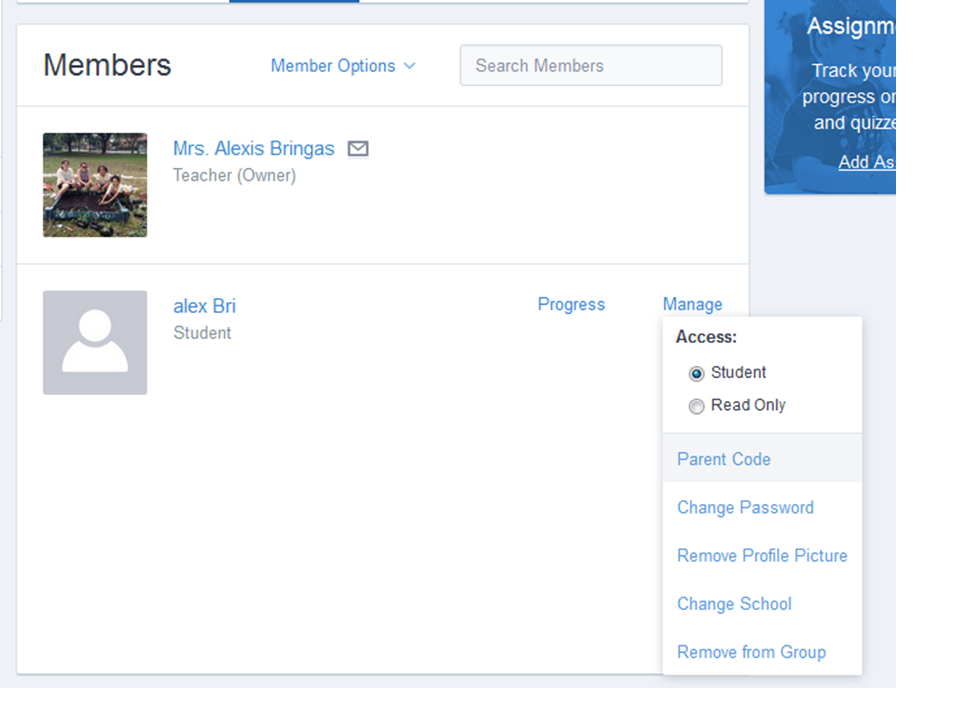
Access - here you can change them from student to read-only. This is where I change students who are not using edmodo properly.
Parent Code - This gives you the code for the students parent to sign up and monitor their child's progress in the class. They can't message any other students or see what other students are doing on the page.
Change Password - My students ALWAYS forget their password! I reset it here.
Remove Profile Picture - If you think a profile picture is inappropriate, remove it here and have the students pick something else.
Change School - change the students location, (I never really use this).
Remove from Group - remove the user from the group!
woo! you made it to the end! that's all for this summer series #2! check back soon for the next edmodo summer series where we look at posting assignments, quizzes, polls, and creating snapshots for the group!
happy summer! :)
No comments:
Post a Comment